I like to create blog posts that easily and quickly help others with roadblocks that I’ve encountered while working on projects. I was not able to find a specific article that could show, step-by-step, how to publish a preconfigured Citrix Studio 7.x.
Scenario:
In a large company, you could have multiple Citrix Sites of different versions and spanning the globe. There are also different groups of administrators that would need access to manage the Citrix Sites.
In this post, we will go through the process of publishing a preconfigured Citrix Studio pointing to a specific Delivery Controller. The benefits of this method is that users accessing the published Citrix Studio application do not need a Delivery Controller name. In addition, you can force the published Studio to manage the specific Site you want.
Having to RDP to a Controller in order to launch Citrix Studio is not only time-consuming, but it also takes up one of the two allowed RDP connections to a server. An easier method I’ve used is to publish the Citrix Studio. However, when you launch Citrix Studio for the first time, it asks to enter a Delivery Controller name of the Site you want to manage. This creates some issues. First, the user would need to know a Delivery Controller name in the Site. Second, the user could enter a Delivery Controller of a different Site by mistake. The second issue is important because you do not want a Studio from a 7.15 Site connecting to a Delivery Controller of a 1912 Site or vice versa. This can cause havoc to the environment and even cause database and policy corruptions.
The best method to make sure Studio is connecting to the correct Site is by publishing a preconfigured Studio using a Delivery Controller of your choosing.
Solution:
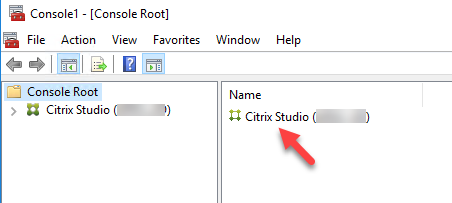
Create a custom MMC file for the Citrix Studio console
Citrix Studio is a snap-in within the Microsoft Management Console. As such, we can create a file with our requirements and publish it. Here are the steps:
- Install Citrix Studio on a Citrix Virtual App server.
- Create a MSC file from the server where Studio is installed:
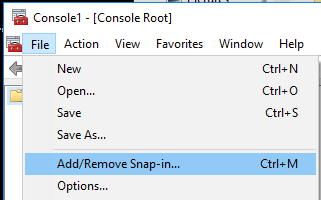
- Launch the Microsoft Management Console by clicking Start and type mmc.exe or C:\Windows System32\mmc.exe
- Click File and select the Add/Remove Snap-in option
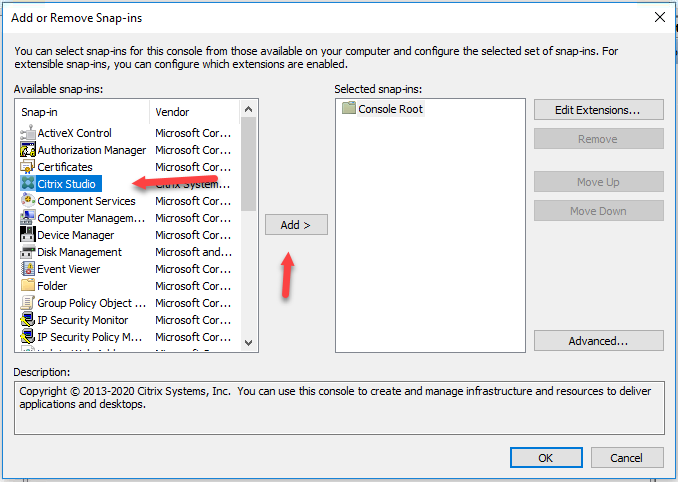
- Select Citrix Studio from the left panel and click Add.
- The next window will ask you to enter an address of a Delivery Controller.
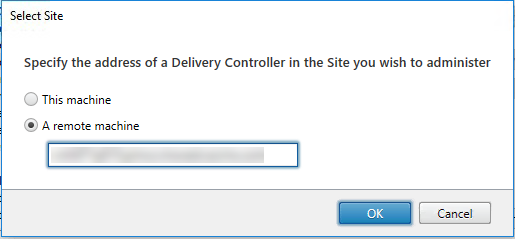
- Click OK.
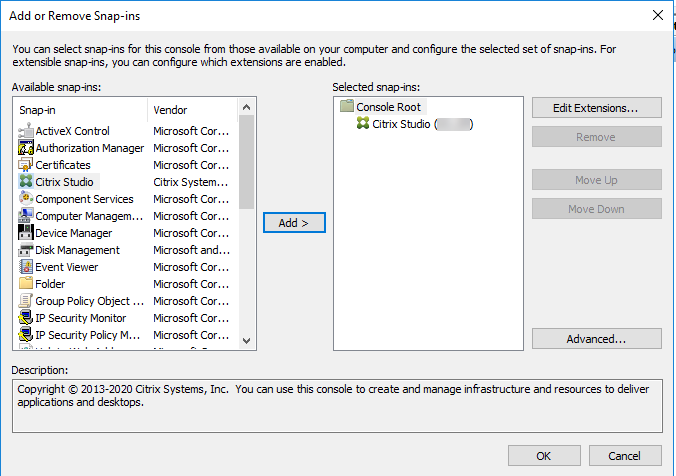
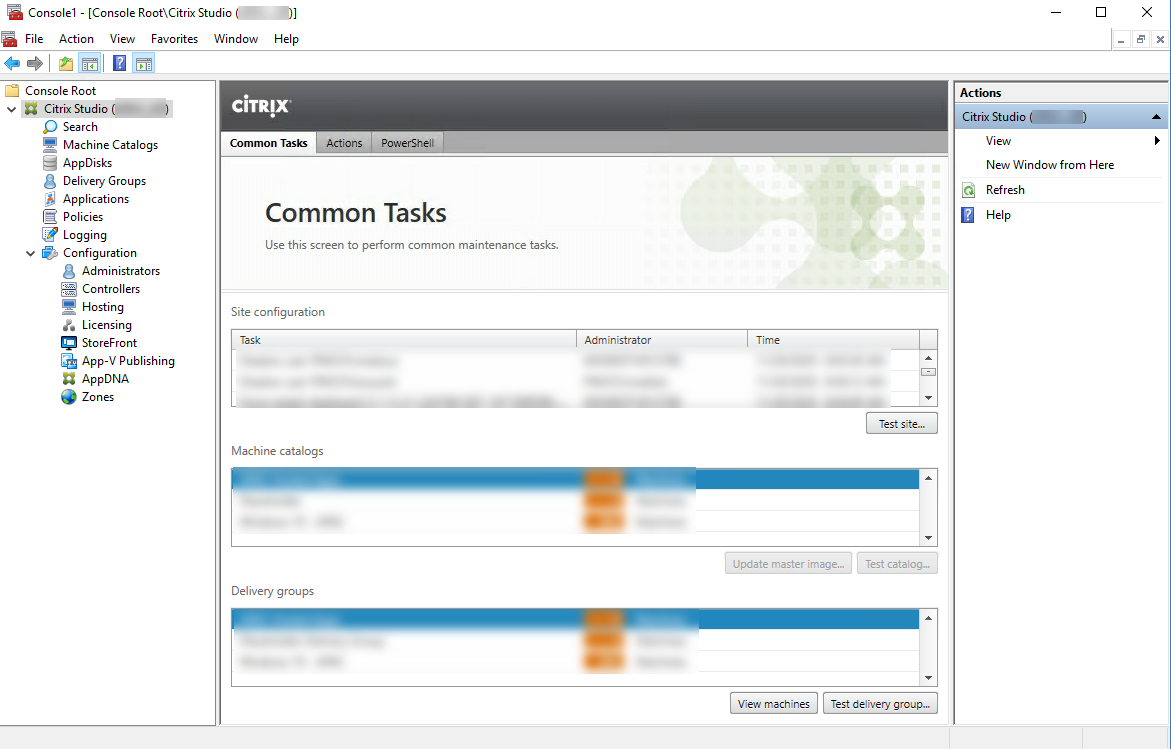
- Double click Citrix Studio on the right panel and click OK.
- This will then show the complete Studio console
Secure the Citrix Studio File
Next, we need to lockdown the file so it cannot be changed when published. If this step is skipped, a user could modify the file by adding snap-ins to the MMC console. This would affect all users since the file being modified is the one that the published Studio is configured to use.
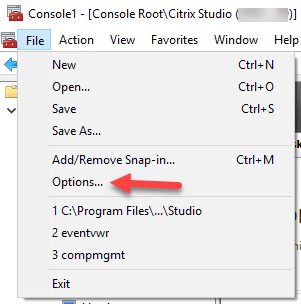
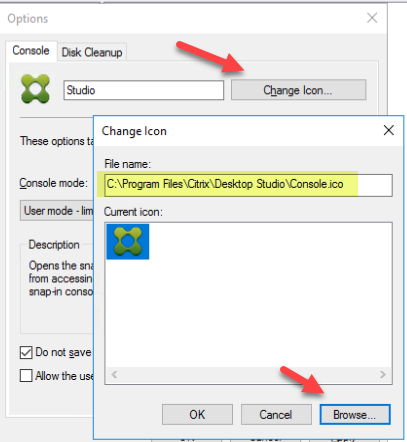
- Click File > Options.
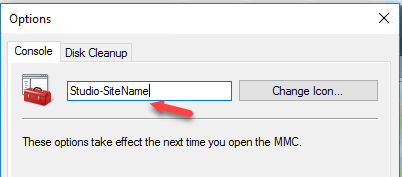
- Change the name to the Site that you will be managing.
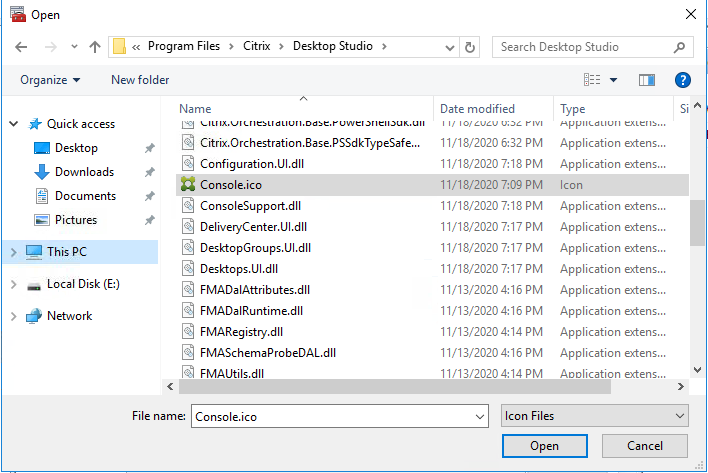
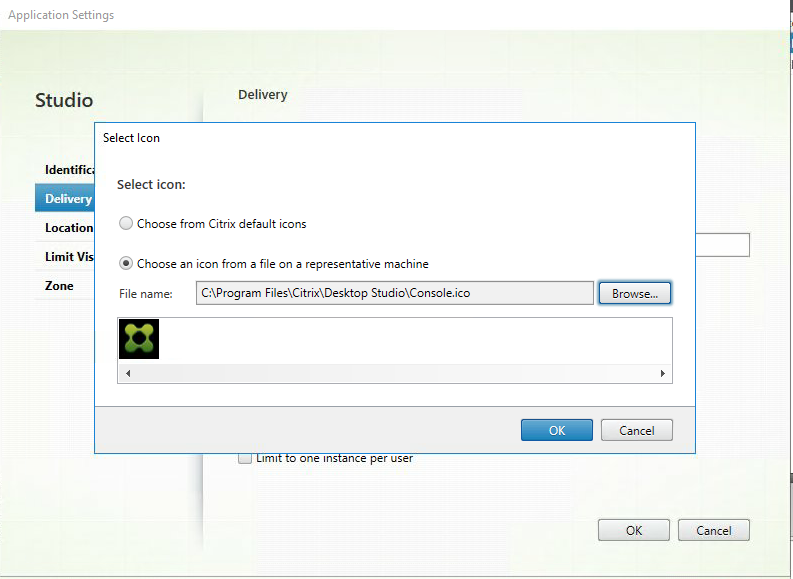
- To change the icon so it looks like the Citrix Studio icon, select the Change Icon button, then browse to the C:\Program Files\Citrix\Desktop Studio folder, and select the Console.ico file.
- To lock down the file:
- Select the User mode – limited access, single window option under the Console mode: section.
- Check the box Do not save changes to this console
- Clear out the box Allow the user to customize views
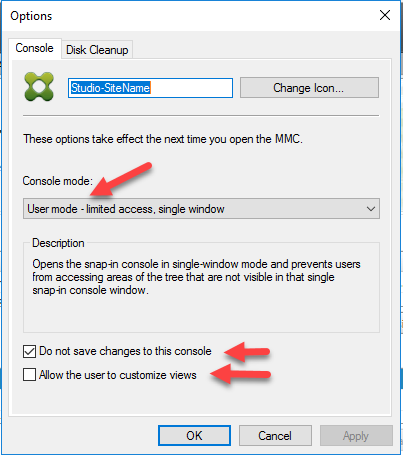
- Click OK and save the file to a share or locally on the server.
Publish Studio
Now that the file has been created and secured, it can be publish for users to access.
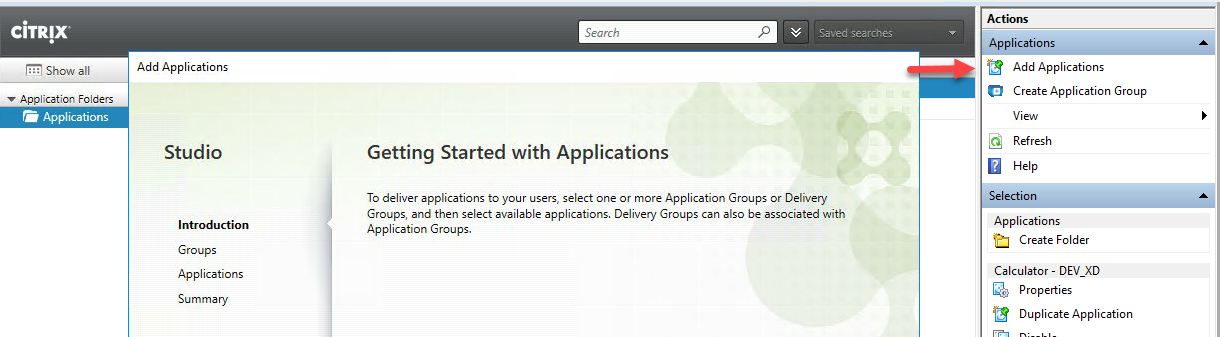
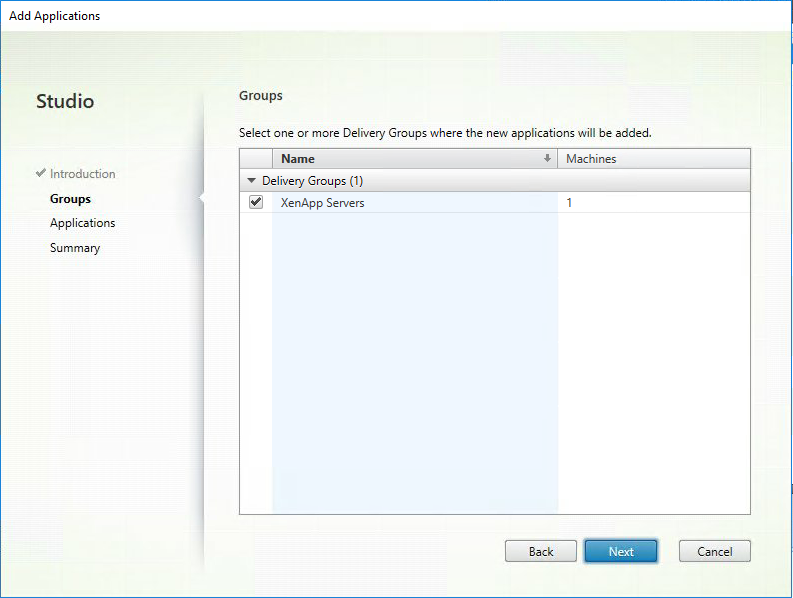
- In Studio, click Add Applications to start the wizard.
- Select the Delivery Group with the server where Studio is installed.
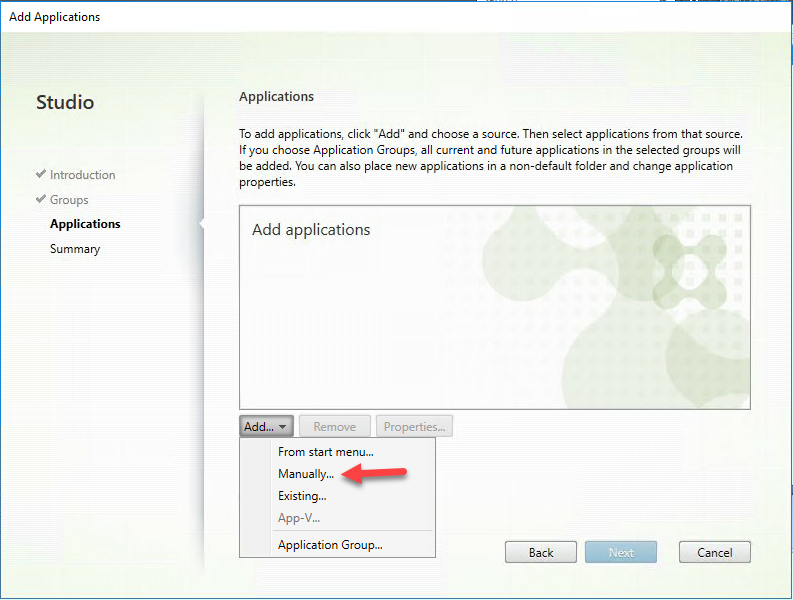
- Click Add and select the Manually... option in order to enter the configuration needed to publish the applications.
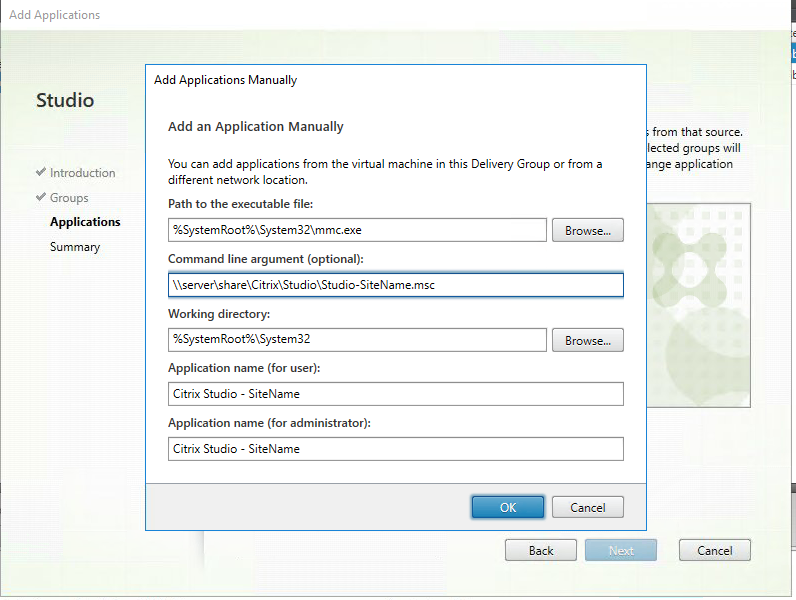
- Under the Path to the executable file: browse to the Microsoft Management Console executable file %SystemRoot%\System32\mmc.exe
- Under the Command line argument section, point to the location of the Studio MSC file created earlier.
- The Working directory section is automatically created when the path to the executable was entered in the previous step.
- Enter the application name.
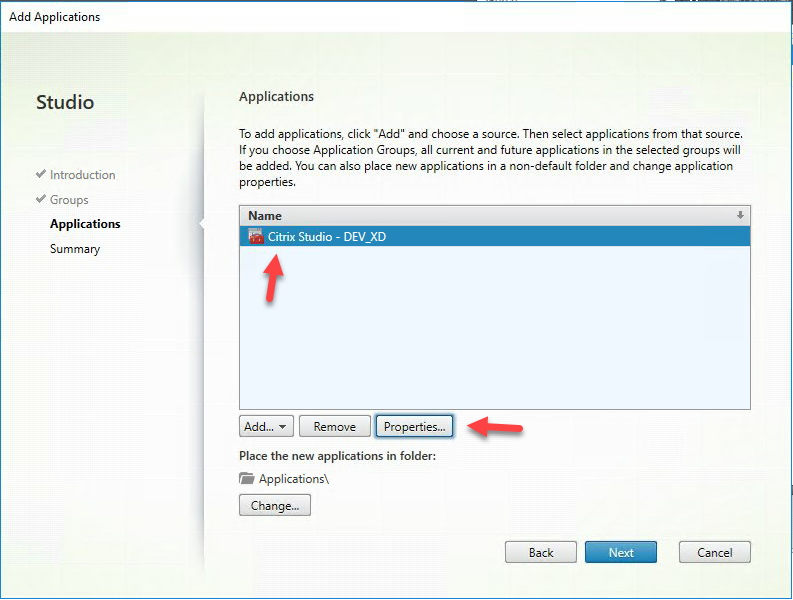
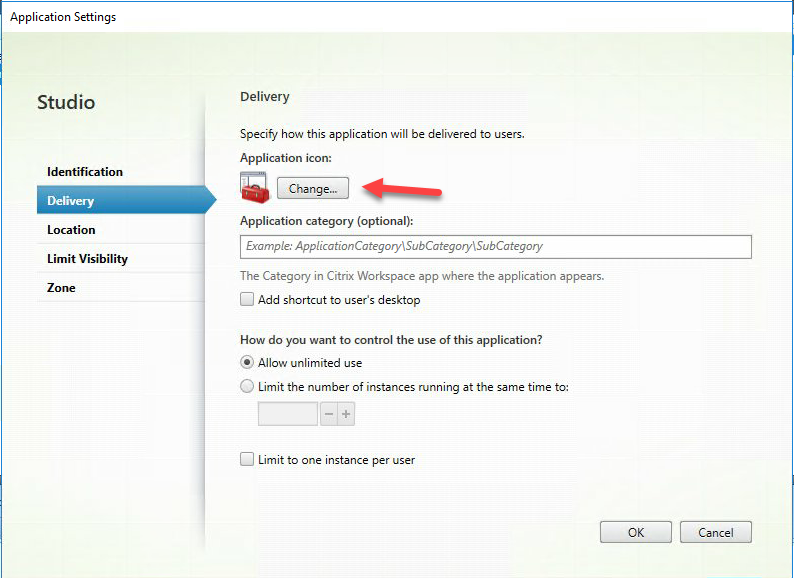
- Change the icon of the application so it looks like the Studio icon.
- Select the icon
- Click Properties
- Click the Change button
- Browse to the file name Console.ico located in C:\Program Files\Citrix\Desktop Studio\Console.ico.
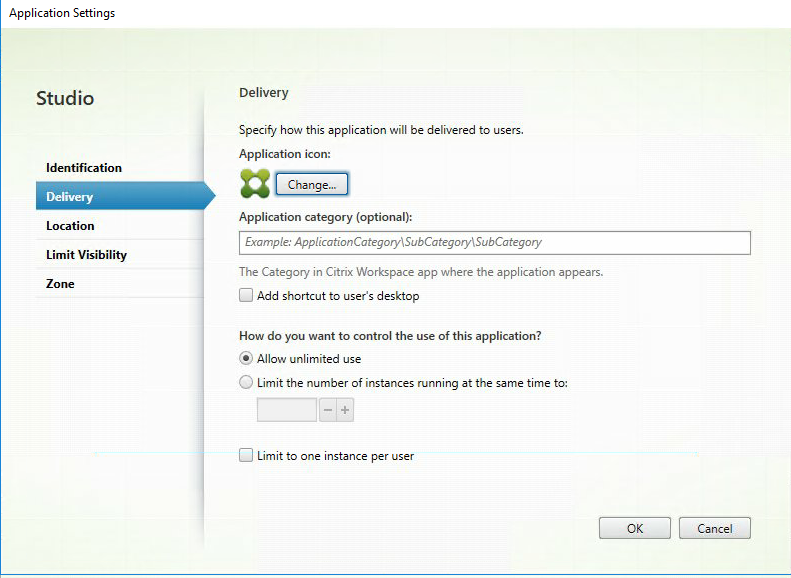
- Click OK > Next > Finish
What to do when a change is required.
There are times when the published Studio file would need to be modified because of a change in the Citrix Site. For example, the Delivery Controller initially used to create the file is being replaced. In this situation, the best course of action is to create a new file following the directions at the beginning of this blog post.